Friday, November 1, 2013

Becoming Grateful Day 1: Start a Gratitude Journal


START A GRATITUDE JOURNAL

When Sarah and I decided to work on our Becoming Grateful series, one the first things we both thought of doing was starting a gratitude journal. Keeping a record of things you are grateful during the day will help you recognize how much God has blessed you and your family. Even if you just start by writing down one thing your are thankful for at the end of each day, it will start to be challenging to just select one.

President Henry B. Eyering shared his experiences with keeping a gratitude journal during the October 2009 LDS General Conference. In his talk Oh Remember, Remember he shared this experience:

I wrote down a few lines every day for years. I never missed a day no matter how tired I was or how early I would have to start the next day. Before I would write, I would ponder this question: 'Have I seen the Hand of God reaching out to touch us or our children or our family today?' As I kept at it, something began to happen. As I would cast my mind over the day, I would see evidence of what God had done for one of us that I had not recognized in the busy moments of the day. As that happened, and it happened often, I realized that trying to remember had allowed God to show me what He had done. 
More than gratitude began to grow in my heart. Testimony grew. I became ever more certain that our Heavenly Father hears and answers prayers. I felt more gratitude for the softening and refining that come because of the Atonement of the Savior Jesus Christ.
There are lots of ways to keep a gratitude journal. Whether its a small notebook you keep in your purse or pocket to jot down a thankful thought the moment it comes to you, or a fancy scrapbooked album where you keep record of the things you are most grateful for, or a simple pad of paper on your nightstand, try making an effort to record something each day.

This is one of the most beautiful gratitude journals I've seen. Created by Valerie Sjodin, she used her artistic talent to fill all the space with images, quotes, and words of inspiration and thankfulness. This would definitely be a project to work on over time, but what a beautiful way to capture all the things you are grateful for!


You don't have to get fancy. The point is to start keeping a record of the things you are grateful for each day. Just like President Eyering, you'll begin to recognize how much God has blessed you with during this 30 day process, and hopefully will continue to keep a record of the things you are grateful for.


"On the recollection of so many and great favors and blessings,  I now, with a high sense of gratitude, presume to offer up my thanks to the Almighty, the Creator and Preserver."

William Bartram 
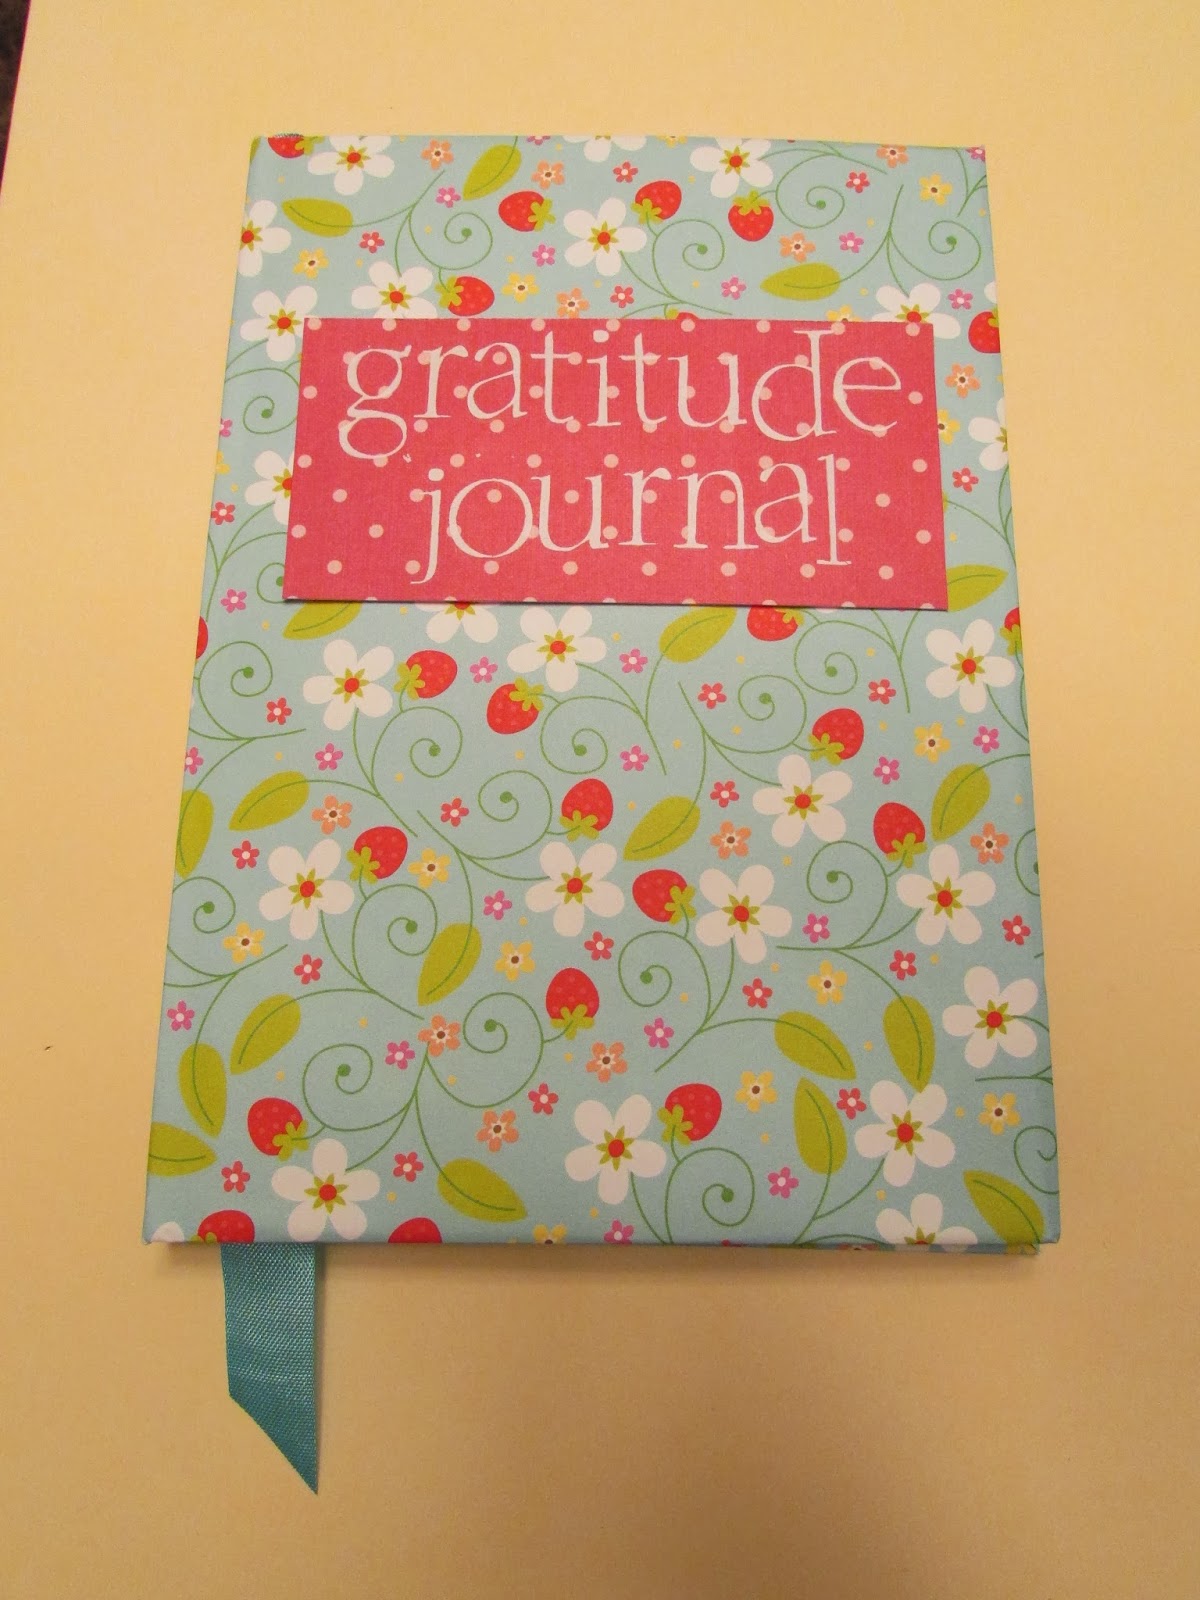

I happen to have a notebook hoarding problem, or so my husband says. So when I wanted to start my gratitude journal this month, you'd think I'd just have to pick out any notebook and choose a blessing to start with. It wasn't that easy. I wanted a NEW notebook to use that was specifically for this project. I wanted to keep it simple though, so I found a great one at my local dollar store to personalize. Here's a tutorial below for how I embellished my notebook to start my gratitude journal.

Supplies
1 notebook, any size
2 pieces of pattern paper that are larger than the notebook (wrapping paper would work great)
1 piece ribbon, at least 3" longer that the height of your notebook
double sided tape or adhesive
scoring tool
paper trimmer
scissors
ruler
any decorative elements you want


 Step 1: Measure your notebook to determine how large to cut your paper. You need height and width. When measuring your width, include front, back, and spine. Then add 2" to each measurement. 
My notebook was 7" tall, and 5" across with a 3/8" spine. I ended up trimming my pattern paper to 
12 3/8" W x 9" H. 

Step 2: Score your edged. I used my scoring knife to score 1 " around all sides of the paper. The inside of the square you've just created will be the exact size of your notebook surface. Fold these edges on the score lines to create flaps. These flaps will wrap around your notebook. 

Step 3: You want to fold down the portion of the paper that will be over the spine so that it is the exact height of your notebook. The easiest way to do this is to wrap the paper around your notebook with the two flaps folding inside the notebook. Nothing is glued down at this point. This will help you determine where your spine hits the paper, since the cover of the notebook will take up a little extra width depending on it's thickness. Gently press the paper along the edges of the spine. Open your cover paper back up to find where the spine was and cut along the edges about 1".  Adhere this small flap to the inside of the cover paper. 


Step 4: Trim around all the corners of your pattern paper, including the new ones you'e now created after folding down the spine section. Basically, you are mitering all your corners so the flaps will fold neatly. 


Step 5: Adhere your ribbon to the spine section with double sided tape. I used some beautiful Robbin's egg blue vintage seam binding. It was slightly wider than my notebook spine, but since it is very soft, it will bend with the paper when wrapped around the spine. 


Step 6: Adhere double sided tape (or other adhesive) to all your edges and along the inside of the score lines. If you are using wet glue or a glue stick, only work with one portion at a time to avoid a mess or the cover paper sticking too soon. Start with your longest flap on one side of your paper. You'll adhere this first to the inside of your notebook cover.  


Step 7: Wrap the paper around the notebook and adhere to one cover of the notebook. Next adhere the spine making sure to keep your ribbon sticking out, and continue to wrap the notebook in your pattern paper, adhering it to the cover. Fold the 2 longest flap inside the cover of your notebook on the other side.Your top flaps will still be sticking up. 


Step 8: Fold your top and bottom flaps over the notebook cover and adhere to the inside. It is ok if your flaps to not match up exactly in the corners. This will be covered up. 


 Step 9: Take your second piece of pattern pattern and trim two pieces to 1/2" less than the height and width of the notebook. Since my notebook was 5" x 7", I cut two pieces at 4 1/2" W x 6 1/2" H. Add double sided tape close to edges on the back of both these pieces. 


Step 10: Adhere your smaller pattern paper to the inside of each cover, leaving 1/4" space around the three edges covered by your cover paper. This will cover your corners if they didn't match up, keep the flaps secure, and create a more finished look inside your journal. 


Step 11: Put your ribbon inside your journal to use as a bookmark. Trim the bottom to the length you want.  


Step 12: Embellish and decorate your journal however you want. I used rub-on lettering to create a label that said "gratitude journal." I adhered it to my notebook's new cover with pop-up glue dots.  


Now you have a Gratitude Journal. I'm so pleased with how mine turned out, but even more excited to start using it each day to record things I am grateful for. I know that as I watch for things throughout the day that I could write each night, I'll begin to notice the hand of God in my life and His tender mercies as He blesses me and my family.


-Rachael

Thursday, October 31, 2013

Becoming Grateful 30 Ideas in 30 Days


"And now I would that ye should be humble, and be submissive and gentle, easy to be entreated; full of patience and long-suffering; being temperate in all things; being diligent in keeping the commandments of God at all times; asking for whatsoever things ye stand in need, both spiritual and temporal, always returning thanks unto God of whatsoever things ye do receive."
Alma 7:23

It's that time of year when the red and gold leaves are falling, the temperature is a little crisper, and the desire to eat pumpkin pie is nearly overwhelming. The Thanksgiving season is upon us, at least it should be a season, and not just a single day to eat turkey and watch football. We wanted to enjoy this season by really showing our gratitude for the many blessings we have, and increase that gratitude by working on recognizing all the blessings God grants unto us and our families. We've decided to come up with something to do each day in our own lives as we try to Become more grateful and full of thanksgiving. 

"Giving thanks always for all things unto God and the Father in the name of our Lord Jesus Christ."
Ephesians 5:20

We both feel that being grateful is not only a good thing to be, but a divine quality to Become.  Think about someone you know who lives a life full of gratitude.  This person experiences life just like us, sometimes experiencing adversity or challenges that are extremely hard or more than what we think we could deal with. Yet this person lives in gratitude.  Don't you find their gratitude infectious and inspiring?  Their gratitude gives them hope, determination, peace, strength and happiness and love.  That kind of person can't keep it all to themselves and their gratitude spills into your life too. We hope you'll join us as we try to Become grateful this month and keep that attitude of gratitude part of our lives. 

-Sarah & Rachael

Sunday, October 27, 2013

Be Thou an Example

Today my husband and I were driving down the road in the city.  As we temporarily stopped at a red light, I did what I usually do...people watch.  There was a group of teens all dressed up walking together out of building towards the corner, probably on their way to get food to eat.  That's what we were doing.

Like I just said, they were all dressed up in business attire.  We think they might have been a school group doing a presentation or something like a debate contest thingy.  They all looked very nice and professional, so I can say I was SHOCKED when I witnessed the following 10 second scene.

One of the boys towards the back accidentally dropped a bunch of money out of his pocket.  It scattered all about his feet in little folded pieces.  Several of his friends/associates reached down to help him gather it all up.  However, one boy reached down, picked up a bill and put it in his own pocket.  He didn't even look think twice and no one noticed.

WHAAAAAT????????????  NO WAY!!!!!!!!!!!!!!!! DID THAT SERIOUSLY JUST HAPPEN????????

I couldn't believe my eyes!  Did I really see that?  I said "Randy, did you just see that?"  To which he replied, "Yes. Yes, I did."

I'm not joking when I say I was shocked.  I seriously did not believe it and thought I just imagined the kid pick something up off the ground and put it in his pocket.  I wanted to roll down my window and yell "HEY, YOU, THIEF" or "CHECK HIS POCKETS!" or something to that effect.  Instead the light turned green and I just made a lot of "whaaa?" "wow" and "whoa" sounds within the walls of the vehicle.

We watched the kid who dropped his money look around and count it up and look around again like it didn't quite add up right.  Ever misplace or lose money or have someone steal it before? I find it scary and I feel like I'm losing my mind.  "It was right here one second ago!" kind of thing.  Sad day, even if it was only a dollar.  Even more sad is the other guy--stealing and doing it so casually.  He was soo good at it.  I sadlly doubt it was a first time swipe.

Randy's next comment was "I would not hire that guy."  Agreed.  Too bad you don't always know who "that guy is."  I hope he grows up to be something better than that.  I've often heard the phrase "the real you is who you are when no one is looking" or something like that.  Amazing that you can think no one is looking, but you really have no idea who is looking and the effect it has on them.

This brought back memories from long ago.  I can't say for certain what happened, and I doubt anyone else involved remembers it, but I will never forget the impact it had on me.  Once my mom sent me to the store to get something very important.  I went with a friend.  One the way home we stopped to get a treat, even though I knew we should have gone straight home.  As it turns out, I dropped the leftover cash accidently and when I gathered it all up, it didn't add up to the amount it should have.  I never found all the money.  I suspected 'foul play,' but don't really know for certain.  What I learned was to take care of what others entrust to you, don't alter your plans when you know someone is counting on you, and be honest is every way you can.  At the time, my mom was very disappointed in me.  I honestly explained what had happened.  I know she forgave me, but it was lesson learned the hard way.

Today I saw an example I'll teach my kids not to follow.  Instead, I want them to always remember this instead: "Let no man despise thy youth; but be thou an example of the believers, in word, in conversation, in charity, in spirit, in faith, in purity." 1 Timothy 4:12.  I understand what "let no man despise thy youth" now.  If ever a scripture came alive for me, this one was it.

Sarah

Saturday, October 26, 2013

Fanciful Witch Hat...


Here it is, the most fanciful witch hat you've ever seen!  I've always wanted to make one, and finally gathered all the supplies to make it happen. The hardest part was deciding what to put on the hat since I had looked at so many other beautiful designs. I could have gathered more and more items, but just finally had to start! It was such a fun project, even though I've almost sworn off shopping at Hobby Lobby in the process after having such a horrible experience there while gathering some of my supplies. Since when did they stop matching coupons? And since when did they stop honoring sale prices when the sale sign is right in front of the item? And since when did the store manager treat you so horribly when its clearly a big feat to make it all the way up to the store with a baby? Well, regardless of my unfortunate shopping event, and a few more dollars spent than I originally intended, I think this witch hat turned out pretty fantastic. So here's the steps I took so you can make one yourself!

First, gather your supplies. 

Witch Hat
I found one at the grocery store for just $4! It has black cheesecloth over the top so it's already a little decorated.

Ribbon:You'll need a few styles of ribbon, the more the better! I used some lime green tulle, a 3" black sheer with a ruffled edge, and a 2" black and white damask. I had some other colors, but didn't end up using them. 

Flower:
I used one large rose, but you could use a small premade silk floral bouquet and take it apart to have a variety of flowers. 

Details:
I picked up some cute glittery Halloween picks with bats and spiders at 1/2 off. I also found a small pumpkin to add, a large black quill feather. 

And you'll need your glue gun - it's like duck tape for the crafting world!


 I started with the tulle ribbon, since it was the most fluffy and would serve as a good base. The way I tie bows is pretty easy - I all it the fold and tie method. Basically you fold the ribbon back and forth to create as many loops as you want, keeping the center loosely held between your fingers. Then use another small piece of ribbon or tulle to tie around the center of all the loops. Voila! You have a bow. Use your glue gun to secure the tulle in place on your witch hat.


 Follow the same bow technique with your next ribbon of choice. You can see how the ribbon is just folded over to make multiple loops, leaving one "tail" on top, and one "tail" on the bottom. Tie the middle, then secure with glue right on top of your tulle. 


With my third ribbon, I wanted to make sure the loops were placed exactly where I wanted, which can sometimes be hard when its all tied together. I cut the ribbon for each part, the tails and the loops, separate so I could glue them on exactly where I wanted. I attached the tails right to the black ribbon so it would create a background affect. 


Before adding your loops, glue in your feather so it can be behind all the loops. 


Once you've finished your bow, you can start adding all the embellishments! I clipped the flower's stem off and glued it right in the center. If you're using multiple flowers, it would look beautiful to add them going up the top of the hat like a growing garden. 


I snipped the floral picks to create several shorter pieces, and glued them around the flower and ribbon. These bats turn so I could face them any way I wanted. Next, I added the bright pumpkin and cute glittery spider. It would be fund to have it dangling from the hat too! 


 Now you have a beautiful, fanciful witch hat to use as the perfect Halloween center piece, or to wear! 


Thursday, October 24, 2013

Halloween...


I just love Halloween! It is such a fun holiday and the decorations are darling! This year, I kept it a little low key, but our sister Marina did a great job of spookifying her home. She made this beautiful wreath that was inspired by one on Pinterest. When I saw her finished product compared to the picture of the one she'd seen, I think hers turned out above and beyond the original! Instead of feathers, she used black dried grass which gave an awesome texture layered over the burlap. And the ivory sunflower adds a lot of pop! It's all in the details!


I loved how she used the festive banners on her mantel, entry console table, and on a curtain rod above the French doors to the office. So I had to get some for myself! The b"Ann"ers are designed and made her friend Ann. She's in the process of making some for Thanksgiving and I can't wait. One will be featured in our upcoming series "Becoming Grateful: 30 Ideas in 30 Days" so be on the look out for that! If you're interested in purchasing any of these b"Ann"ers or similar ones, send us an email. They really make decorating so easy and are so darling. 


Here's my b"Ann"ers tied onto my dining room shelves. Don't you just love the "Boo"?! I love how Ann incorporated the burlap with the festive paper. And see that witch hat in the corner? I'll be turning it into a beautiful fancy witch hat. I know Halloween is almost upon us so I'm a little late in the month to be getting this done, but I'll be posting a quick tutorial in the next few days! 

See you soon,
Rachael 

Tuesday, October 22, 2013

Funny things kids say

My kids have said some funny things lately.  I should write them down right as they happen so I can laugh about it later instead of forgetting.

Today at lunch the milk was pretty near gone.  Sam knew this.  He said that when it was gone then he would drink my almond milk in the fridge.  To me "You want to share your milk with me.  I will go get it."  Sure kid, how did you know I wanted to give it to you?

There's more funny things like that, but I can't remember them right now.  When I do, I'll be sure to write them down though.

Sarah

Tuesday, October 15, 2013

Becoming a baker...

We recently blessed our little Liberty in church. What a wonderful and sweet day to see my husband take our precious girl in his arms and pronounce a blessing on her in church with so many of our family and friends joining us to celebrate! We had a a great luncheon after at another sisters home. The food was so yummy! And I've been getting many compliments on the delicious cakes we had. I had originally wanted to order them from a local bakery after Sarah had done the same for her little girl's 1st birthday, but the budget dictated otherwise. I didn't have cake pans small enough to mimic the bakery size, but went with a 7" round size. It was a joint effort between my mom, oldest sister, and myself to make them, so here are the tips we used so you can try them out yourselves!

We had three different cake flavors that started out as a box cake mix! That's right, from a box, and then "enhanced." One chocolate, one strawberry, and one vanilla. I think next time instead of using a vanilla cake mix, I'd just stick with a white cake since the emulsion flavors added are what really give it the wonderful flavor. In addition to adding vanilla extract, our sister Marina who did the actually baking, added LorAnn Princess Cake And Cookie Bakery Emulsion. It is so yummy! She found it at Orson Gygi, but you can probably find a similar item at any specialty baking store. Marina made the cakes a few days ahead of time and kept them in the freezer wrapped in saran. This also helps keep the moisture in. Here's Marina's directions for baking the cake instead of following the ones on the box. This makes your cake more dense and very moist. For the fillings, we used real fruit, raspberries and strawberries, with a chocolate mouse or whip cream. Our cakes had three layers of cake with two layers of filling.

1 box white cake mix (or whatever flavor you like!)
1 cup flour
1 cup sugar
3/4 tsp. salt
4 egg whites
1 1/3 cup water
2 Tbs. oil
1 cup sour cream
1 tsp. clear vanilla
1 tsp. almond extract (or emulsion extract)
Mix together and bake according to pkg. directions. 


Now, for the frosting; my favorite part of a cake! We used this delicious Sturdy Buttercream Frosting found on Pinterest of course. This frosting was delicious and had the best texture to make the rosette design on the cake. Some butter cream frostings are too soft and won't hold the shape as well. My mom and I both frosted the cakes, and it was a lot of work! But once we got the hang of it, it actually went pretty fast. I recommend putting a thin layer of frosting on the cake before adding your rosettes. This will help keep crumbs to a minimum, as well as cover any holes between the rosettes. Use a large open star tip and work your way from the base of the cake to to top. The rosettes look best if you start from the center and swirl towards the outside. This will also help you be able to frost over any edges of the previous rosette if needed. It took about one batch of frosting per cake.


Sturdy Buttercream Frosting

1 cup white Crisco shortening
1 cup butter (room temperature)
6-6 1/2 cups powdered sugar
1/2 cup whipping cream
2 tsp vanilla extract
1 tsp almont extract (I only put this in the frosting for the chocolate cake)

In a large bowl, ship shortening and butter together on high for 3 minutes. Add powdered sugar, extracts, adn whipping cream and whip on high for about 8-10 minutes until smooth. Once cake is frosted, set in fridge or cool place to "set." Remove about an hour prior to serving. 


A lot of people also asked me where we found Libby's beautiful blessing dress. Well folks, my mother-in-law made it. And she made it in just a few days! That's right, she's amazing. We already had the beautiful ivory peau de soie from back when I tried to match fabric for the wedding dress I almost bought. I ended up going with a different dress, but still had a few yards of ivory satins and other fabrics just waiting to be made into this dress! I began my search for the lace month before Libby was born, but didn't find the right one until just a few weeks before the blessing! We had a pattern, but the sleeves on it were so poofy! I didn't want my little one to fly away, so we patterned them after a little onesie I had that had a layer of lace over the fabric. We just copied the idea. I just love the cathedral length, and the delicate pattern of the lace was perfect. There are beautiful jeweled buttons on the back too!

The night before the blessing, I stayed up pretty late to finish a few things for the luncheon and to make the floral belt and matching head band for the dress. I love the trend of the floral belts for wedding gowns, so I wanted a similar look for Libby's dress. You'll soon be able to purchase similar belts on my Etsy shop!

While in between making the pineapple cheese cake desserts and before getting out the glue gun, I was trying to reorganize the refrigerator to make room. This was around 3 am. Well, we have a broken shelf in the door  so I can only put a few sturdy items on it. Sadly, an unopened container of tomato basil soup, you know the kind you get at Costco? fell off the shelf, hit another, and cracked open spewing red creamy soup everywhere! It was on every other shelf in the fridge, the bottom rubber seal, inside the vegetable crisper drawers, on my socks and even my cropped yoga pants, the dishwasher and oven doors, simply every where! How do you begin to even clean that up? I couldn't let the fridge door shut because it would just push the soup on the bottom ledge farther back, and it was seeping underneath the fridge as well. I was near tears as I started scooping it up with paper towels into my already full garbage can. Remember, I had already been baking most of the night. I just prayed and prayed that our baby, who was surprisingly still soundly asleep after her regular 3 hour max, would stay asleep. I think if I had to tend to a hungry crying baby while tomato soup oozed across my floor, I would have just cried! I nearly did anyway, but 1 and 1/2 rolls of paper towels later, a few dish rags, and a change of clothes later, everything was cleaned up as if it had never happened and I was onto my crafty belt project.

I used double sided satin ribbon and four ivory chiffon flowers, each with pearls and crystals in the center. I was going to make a larger belt with a variety of floral accents, but I think the more simple look was the perfect fit for Libby's dress. I also made a matching headband for Libby. It was perfect and just the right amount of bling!