START A GRATITUDE JOURNAL
When Sarah and I decided to work on our Becoming Grateful series, one the first things we both thought of doing was starting a gratitude journal. Keeping a record of things you are grateful during the day will help you recognize how much God has blessed you and your family. Even if you just start by writing down one thing your are thankful for at the end of each day, it will start to be challenging to just select one.
President Henry B. Eyering shared his experiences with keeping a gratitude journal during the October 2009 LDS General Conference. In his talk Oh Remember, Remember he shared this experience:
I wrote down a few lines every day for years. I never missed a day no matter how tired I was or how early I would have to start the next day. Before I would write, I would ponder this question: 'Have I seen the Hand of God reaching out to touch us or our children or our family today?' As I kept at it, something began to happen. As I would cast my mind over the day, I would see evidence of what God had done for one of us that I had not recognized in the busy moments of the day. As that happened, and it happened often, I realized that trying to remember had allowed God to show me what He had done.
More than gratitude began to grow in my heart. Testimony grew. I became ever more certain that our Heavenly Father hears and answers prayers. I felt more gratitude for the softening and refining that come because of the Atonement of the Savior Jesus Christ.There are lots of ways to keep a gratitude journal. Whether its a small notebook you keep in your purse or pocket to jot down a thankful thought the moment it comes to you, or a fancy scrapbooked album where you keep record of the things you are most grateful for, or a simple pad of paper on your nightstand, try making an effort to record something each day.


You don't have to get fancy. The point is to start keeping a record of the things you are grateful for each day. Just like President Eyering, you'll begin to recognize how much God has blessed you with during this 30 day process, and hopefully will continue to keep a record of the things you are grateful for.
"On the recollection of so many and great favors and blessings, I now, with a high sense of gratitude, presume to offer up my thanks to the Almighty, the Creator and Preserver."
William Bartram
Supplies
1 notebook, any size
2 pieces of pattern paper that are larger than the notebook (wrapping paper would work great)
1 piece ribbon, at least 3" longer that the height of your notebook
double sided tape or adhesive
scoring tool
paper trimmer
scissors
ruler
any decorative elements you want

Step 1: Measure your notebook to determine how large to cut your paper. You need height and width. When measuring your width, include front, back, and spine. Then add 2" to each measurement.
My notebook was 7" tall, and 5" across with a 3/8" spine. I ended up trimming my pattern paper to
12 3/8" W x 9" H.

Step 2: Score your edged. I used my scoring knife to score 1 " around all sides of the paper. The inside of the square you've just created will be the exact size of your notebook surface. Fold these edges on the score lines to create flaps. These flaps will wrap around your notebook.
Step 3: You want to fold down the portion of the paper that will be over the spine so that it is the exact height of your notebook. The easiest way to do this is to wrap the paper around your notebook with the two flaps folding inside the notebook. Nothing is glued down at this point. This will help you determine where your spine hits the paper, since the cover of the notebook will take up a little extra width depending on it's thickness. Gently press the paper along the edges of the spine. Open your cover paper back up to find where the spine was and cut along the edges about 1". Adhere this small flap to the inside of the cover paper.


Step 4: Trim around all the corners of your pattern paper, including the new ones you'e now created after folding down the spine section. Basically, you are mitering all your corners so the flaps will fold neatly.

Step 5: Adhere your ribbon to the spine section with double sided tape. I used some beautiful Robbin's egg blue vintage seam binding. It was slightly wider than my notebook spine, but since it is very soft, it will bend with the paper when wrapped around the spine.

Step 6: Adhere double sided tape (or other adhesive) to all your edges and along the inside of the score lines. If you are using wet glue or a glue stick, only work with one portion at a time to avoid a mess or the cover paper sticking too soon. Start with your longest flap on one side of your paper. You'll adhere this first to the inside of your notebook cover.

Step 7: Wrap the paper around the notebook and adhere to one cover of the notebook. Next adhere the spine making sure to keep your ribbon sticking out, and continue to wrap the notebook in your pattern paper, adhering it to the cover. Fold the 2 longest flap inside the cover of your notebook on the other side.Your top flaps will still be sticking up.

Step 8: Fold your top and bottom flaps over the notebook cover and adhere to the inside. It is ok if your flaps to not match up exactly in the corners. This will be covered up.


Step 9: Take your second piece of pattern pattern and trim two pieces to 1/2" less than the height and width of the notebook. Since my notebook was 5" x 7", I cut two pieces at 4 1/2" W x 6 1/2" H. Add double sided tape close to edges on the back of both these pieces.


Step 10: Adhere your smaller pattern paper to the inside of each cover, leaving 1/4" space around the three edges covered by your cover paper. This will cover your corners if they didn't match up, keep the flaps secure, and create a more finished look inside your journal.

Step 11: Put your ribbon inside your journal to use as a bookmark. Trim the bottom to the length you want.

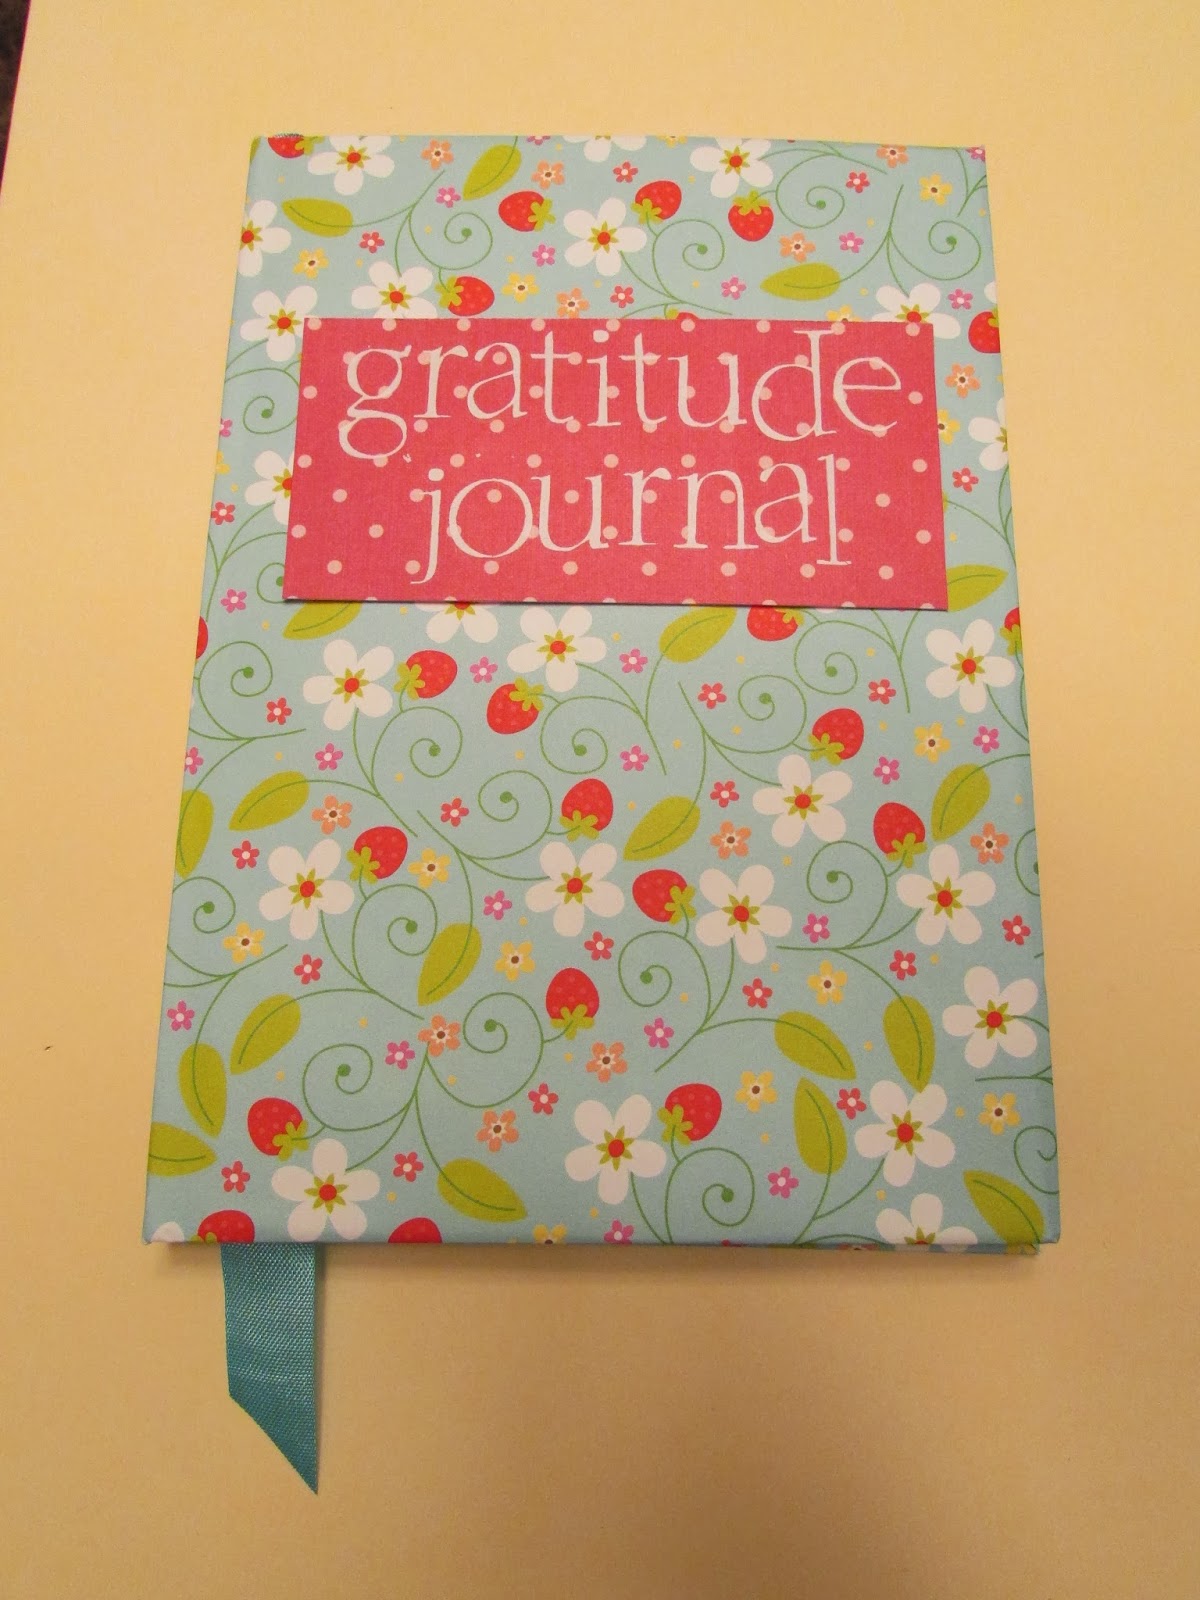
Step 12: Embellish and decorate your journal however you want. I used rub-on lettering to create a label that said "gratitude journal." I adhered it to my notebook's new cover with pop-up glue dots.


Now you have a Gratitude Journal. I'm so pleased with how mine turned out, but even more excited to start using it each day to record things I am grateful for. I know that as I watch for things throughout the day that I could write each night, I'll begin to notice the hand of God in my life and His tender mercies as He blesses me and my family.

-Rachael
No comments:
Post a Comment